NJU_PA 学习记录
NJU_PA 学习记录
本博客用于记录做NJU计算机系统基础的PA时碰到的问题和自己的过程,以及心得体会
说实话第一次得知这个PA时我是很震惊的,感叹道不愧是顶尖学府,跟我们差距可是太大了
在此还是得感谢课程组开放这个很棒的PA至互联网上,让我们这些教育资源不够的计算机弱校(农林高校)学生有机会接触到更好的学习资料
PA0 - 重拾Linux
当时大一装的Linux是CentOS系统,这次PA要用的是Ubuntu系统
问了bing后发现,Ubuntu的包管理器是apt,而CentOS的包管理器是yum或dnf(CentOS
8及更高版本)
为了无脑跟随PA教程,我就去装了一个新的Ubuntu虚拟机,并且给了8G的内存
管道
这次重拾Linux,还是收获了很多东西的,我们当时在Linux实训时,完全没有涉及到管道的使用,同时我也没有选修Linux软件开发这门课,所以算是打开了新世界的大门,毕竟以前写程序就想着如果第一个程序的输出能直接当做第二个程序的输入就好了
就比如统计/usr/share目录下磁盘使用情况的命令,用到了管道|
1 | du -sc /usr/share/* | sort -nr |
du是磁盘空间分析工具,du -sc将目录的大小顺次输出到标准输出, 继而通过管道传送给sort.sort是数据排序工具, 其中的选项-n表示按照数值进行排序, 而-r则表示从大到小输出.sort可以将这些参数连写在一起.然而我们发现,
/usr/share中的目录过多, 无法在一个屏幕内显示. 此时, 我们可以再使用一个命令:more或less.
more工具使用空格翻页,less工具可以做到上下翻页,同样使用q退出,感觉less功能更强一些
配置vim
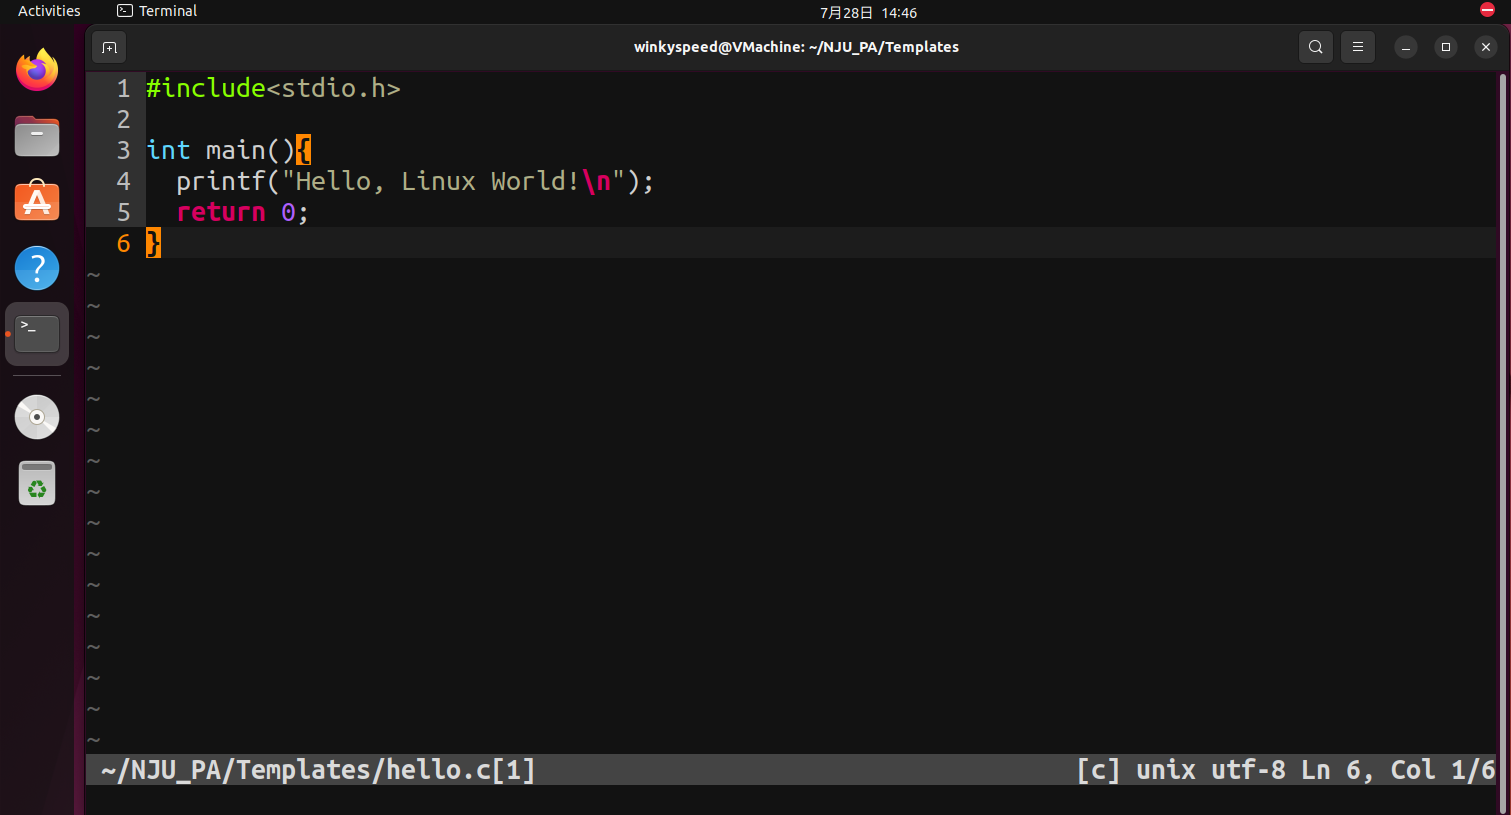
在我重新开始用vim写C语言代码时,发现.vimrc没有配置导致无法排版,无法高亮,于是参考PA里的教程重新配置了.vimrc文件
Modify the
.vimrcfile mentioned above as the following:
2
3
4
5
6
7
8
9
10
11
12
13
14
15
16
17
18
19
20
21
22
23
24
25
26
27
28
+++ after modification
" If using a dark background within the editing area and syntax highlighting
" turn on this option as well
-"set background=dark
+set background=dark
" Uncomment the following to have Vim load indentation rules and plugins
" according to the detected filetype.
-"filetype plugin indent on
+filetype plugin indent on
" The following are commented out as they cause vim to behave a lot
" differently from regular Vi. They are highly recommended though.
"set showcmd " Show (partial) command in status line.
-"set showmatch " Show matching brackets.
-"set ignorecase " Do case insensitive matching
-"set smartcase " Do smart case matching
-"set incsearch " Incremental search
+set showmatch " Show matching brackets.
+set ignorecase " Do case insensitive matching
+set smartcase " Do smart case matching
+set incsearch " Incremental search
"set autowrite " Automatically save before commands like :next and :make
-"set hidden " Hide buffers when they are abandoned
+set hidden " Hide buffers when they are abandoned
"set mouse=a " Enable mouse usage (all modes)You can append the following content at the end of the
.vimrcfile to enable more features. Note that contents after a double quotation mark"are comments, and you do not need to include them. Of course, you can inspect every features to determine to enable or not.
2
3
4
5
6
7
8
9
10
11
12
13
14
15
16
17
18
19
20
21
22
23
24
25
26
27
28
set bufhidden=hide " 当buffer被丢弃的时候隐藏它
colorscheme evening " 设定配色方案
set number " 显示行号
set cursorline " 突出显示当前行
set ruler " 打开状态栏标尺
set shiftwidth=2 " 设定 << 和 >> 命令移动时的宽度为 2
set softtabstop=2 " 使得按退格键时可以一次删掉 2 个空格
set tabstop=2 " 设定 tab 长度为 2
set nobackup " 覆盖文件时不备份
set autochdir " 自动切换当前目录为当前文件所在的目录
set backupcopy=yes " 设置备份时的行为为覆盖
set hlsearch " 搜索时高亮显示被找到的文本
set noerrorbells " 关闭错误信息响铃
set novisualbell " 关闭使用可视响铃代替呼叫
set t_vb= " 置空错误铃声的终端代码
set matchtime=2 " 短暂跳转到匹配括号的时间
set magic " 设置魔术
set smartindent " 开启新行时使用智能自动缩进
set backspace=indent,eol,start " 不设定在插入状态无法用退格键和 Delete 键删除回车符
set cmdheight=1 " 设定命令行的行数为 1
set laststatus=2 " 显示状态栏 (默认值为 1, 无法显示状态栏)
set statusline=\ %<%F[%1*%M%*%n%R%H]%=\ %y\ %0(%{&fileformat}\ %{&encoding}\ Ln\ %l,\ Col\ %c/%L%) " 设置在状态行显示的信息
set foldenable " 开始折叠
set foldmethod=syntax " 设置语法折叠
set foldcolumn=0 " 设置折叠区域的宽度
setlocal foldlevel=1 " 设置折叠层数为 1
nnoremap <space> @=((foldclosed(line('.')) < 0) ? 'zc' : 'zo')<CR> " 用空格键来开关折叠
除此之外,我还开了set mouse=a这条指令来开启鼠标功能
然后进vim一看,这啥配色,什么审美,直接去搜索什么配色好看,最后看上了一款叫molokai的配色方案
直接git clone https://github.com/tomasr/molokai后把里面的.vim文件复制到~/.vim/colors/目录
再去编辑~/.vimrc/文件,把colorscheme evening改成colorscheme molokai

这个配色方案的高亮行还有些特别,不是默认的拿一根线高亮整行,而是清晰化行的背景跟整个界面的背景,虽然没有那么醒目,不过更好看了,更符合现在编译器的高亮方法,我还是更喜欢这种做法
使用Makefile管理工程
大规模的工程中通常含有几十甚至成百上千个源文件(Linux内核源码有25000+的源文件), 分别键入命令对它们进行编译是十分低效的. Linux提供了一个高效管理工程文件的工具: GNU Make. 我们首先从一个简单的例子开始, 考虑上文提到的Hello World的例子, 在
hello.c所在目录下新建一个文件Makefile, 输入以下内容并保存:
2
3
4
5
6
7
gcc hello.c -o hello # 注意开头的tab, 而不是空格
clean:
rm hello # 注意开头的tab, 而不是空格返回命令行, 键入
make, 你会发现make程序调用了gcc进行编译.Makefile文件由若干规则组成, 规则的格式一般如下:
2
用于生成目标文件的命令序列 # 注意开头的tab, 而不是空格我们来解释一下上文中的
hello规则. 这条规则告诉make程序, 需要生成的目标文件是hello, 它依赖于文件hello.c, 通过执行命令gcc hello.c -o hello来生成hello文件.如果你连续多次执行
make, 你会得到"文件已经是最新版本"的提示信息, 这是make程序智能管理的功能. 如果目标文件已经存在, 并且它比所有依赖文件都要"新", 用于生成目标的命令就不会被执行. 你能想到make程序是如何进行"新"和"旧"的判断的吗?上面例子中的
clean规则比较特殊, 它并不是用来生成一个名为clean的文件, 而是用于清除编译结果, 并且它不依赖于其它任何文件.make程序总是希望通过执行命令来生成目标, 但我们给出的命令rm hello并不是用来生成clean文件, 因此这样的命令总是会被执行. 你需要键入make clean命令来告诉make程序执行clean规则, 这是因为make默认执行在Makefile中文本序排在最前面的规则. 但如果很不幸地, 目录下已经存在了一个名为clean的文件, 执行make clean会得到"文件已经是最新版本"的提示. 解决这个问题的方法是在Makefile中加入一行PHONY: clean, 用于指示"clean是一个伪目标". 这样以后,make程序就不会判断目标文件的新旧, 伪目标相应的命令序列总是会被执行.对于一个规模稍大一点的工程,
Makefile文件还会使用变量, 函数, 调用Shell命令, 隐含规则等功能. 如果你希望学习如何更好地编写一个Makefile, 请到互联网上搜索相关资料.
查找相关资料后,总结一下,这个Makefile是用于同时编译多文件的,使用时需要在这些文件同一目录里touch Makefile,最后使用中间文件编译组合成一个可执行文件,如现在有a.c和b.c,可以这么构建Makefile:
1 | main: a.o b.o |
至于gcc -o和gcc -c,询问bing后给出如下答案:
gcc是GNU编译器集合(GNU Compiler Collection)的一个组件,它用于编译C语言程序。-c和-o是gcc命令的两个选项,它们的含义如下:
-c:这个选项告诉gcc只编译源文件,但不进行链接。当您使用这个选项时,gcc会将每个源文件编译为一个目标文件(.o文件),但不会生成可执行文件。-o file:这个选项用于指定输出文件的名称。当您使用这个选项时,您需要在-o后面指定一个文件名,用于保存gcc命令的输出。如果您没有使用这个选项,那么gcc会使用默认的文件名来保存输出。例如,如果您运行以下命令:
那么
gcc会将源文件a.c编译为目标文件a.o,但不会生成可执行文件。如果您运行以下命令:
那么
gcc会将源文件a.c编译并链接为可执行文件,并将输出保存到名为main的文件中。
重定向
根据MIT计算机教育中缺失的一课中,课程预览与shell里简单介绍了重定向:
在 shell 中,程序有两个主要的“流”:它们的输入流和输出流。 当程序尝试读取信息时,它们会从输入流中进行读取,当程序打印信息时,它们会将信息输出到输出流中。 通常,一个程序的输入输出流都是您的终端。也就是,您的键盘作为输入,显示器作为输出。 但是,我们也可以重定向这些流!
最简单的重定向是
< file和> file。这两个命令可以将程序的输入输出流分别重定向到文件:
2
3
4
5
6
7
8
missing:~$ cat hello.txt
hello
missing:~$ cat < hello.txt
hello
missing:~$ cat < hello.txt > hello2.txt
missing:~$ cat hello2.txt
hello您还可以使用
>>来向一个文件追加内容。使用管道( pipes ),我们能够更好的利用文件重定向。|操作符允许我们将一个程序的输出和另外一个程序的输入连接起来:
2
3
4
drwxr-xr-x 1 root root 4096 Jun 20 2019 var
missing:~$ curl --head --silent google.com | grep --ignore-case content-length | cut --delimiter=' ' -f2
219
配置git
在终端里输入以下命令
1 | git config --global user.name "WinkySpeed" # your name |
ssh连接github
git clone时报错了:
1 | winkyspeed@VMachine:~/NJU_PA$ git clone -b 2022 git@github.com:NJU-ProjectN/ics-pa.git ics2022 |
一开始寻思着只是clone项目应该没必要配置ssh key吧,但是错了,所以还是得整
在STFW以后,得到如下解决方案:
ssh-keygen -t ed25519 -C "2509795463@qq.com"cat ~/.ssh/id_ed25519.pub- 复制内容
github设置里添加SSHssh -T git@github.com测试是否成功,如果输出为Hi username! You've successfully authenticated, but GitHub does not provide shell access.则表示连接成功
配置nemu
按照讲义的步骤,执行到make menuconfig时遇到报错
1 | winkyspeed@VMachine:~/NJU_PA/ics2022/nemu$ make menuconfig |
着眼于make[1]: bison: No such file or directory这一行,也就是说系统中没有bison这个程序,于是就要安装
运行sudo apt-get install bison后再次运行make menuconfig
继续报错,跟刚刚类似,只不过换成了make[1]: flex: No such file or directory,经过STFW后发现flex也是一个程序,继续安装
运行sudo apt-get install flex
成功弹出一个页面,接着按照讲义中写的,选EXIT后YES退出即可
PA0 Compiling and Running NEMU报错解决方法
